
Table of Contents
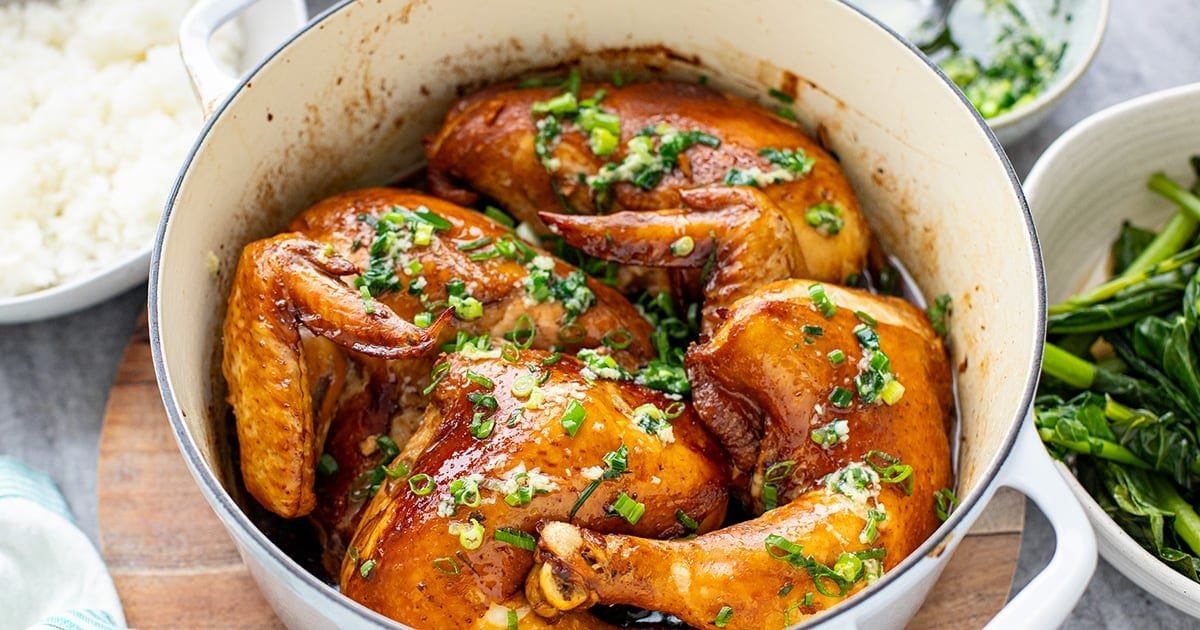
This soy sauce chicken cooks in its own juices on a bed of scallions and ginger — low and slow in a Dutch oven, finished in a hot oven until lacquered and glossy. The ginger scallion oil sauce at the end is the finishing touch that makes it sensational.
Jump to: ℹ️ Overview | 🛒 Ingredients | 📷 How To Make | 📹 Watch The Video | 👩🍳 Recipe Tips | 🥗 Serving Suggestions | 📝Full Recipe Card | 🍽 More Tasty Chicken Recipes
At A Glance
- ⏱ Ready In: 85 minutes (plus 30 min or overnight marinating)
- 🍽 Serves: 6
- 🌱 Diet: Dairy-free; Gluten-free adaptable
- 💪 Nutrition Highlights: High protein, rich in collagen from bone-in chicken
- 🥕 Main Ingredients: Whole chicken, dark soy sauce, light soy sauce, oyster sauce, ginger, scallions, garlic, peanut oil
- 🔥 Flavor Profile: Deep, savory, slightly sweet with a bright, punchy, garlicky finish from the scallion ginger oil
- 🧊 Meal-Prep Friendly: Keeps 4 days in the fridge; pan juices can be saved and reused
- Best Served With: Steamed jasmine rice and blanched Asian greens
You know when you try a dish, and then you can’t stop making it over and over again. Well, that’s the case with this soy sauce chicken! It’s inspired by the Cantonese classic — that glossy, deeply savory bird you see hanging in Chinatown windows — but the cooking method is something a little different and genuinely worth knowing about.
Instead of braising the chicken in a pot full of liquid or roasting it, this chicken cooks almost entirely in its own juices using a no-water technique borrowed from traditional Chinese home cooking. You marinate the chicken pieces or whole chicken in a mix of dark soy, light soy, oyster sauce, and a little sugar, then sit them on a generous bed of scallions, ginger, and garlic in a heavy Dutch oven. The lid goes on, the heat stays low, and the chicken steam-braises in its own concentrated juices — the marinade trickles down into the aromatics, the scallions release their natural moisture, and a small splash of rice vinegar and water gets things going.
What collects at the bottom of the pot by the time you lift the lid is one of the best things I’ve ever tasted straight off a spoon. The oven finish lacquers the skin to a deep mahogany. And then there’s the ginger scallion sauce — scallions, garlic and fresh ginger hit with smoking hot peanut oil — which you spoon over everything at the end. Make extra sauce! You’ll want it on the rice, on the greens, on everything.
👩🍳 You might also like these recipes: honey soy chicken wings, Thai chicken drumsticks (baked), Korean spicy chicken, gochujang chicken, Chinese crispy shredded chicken stir-fry, or ground chicken stir fry.
What You’ll Need
Here is what you’ll need for this Chinese soy sauce chicken recipe. Find the full measurements in the recipe card below.
For the chicken and marinade:
- Whole chicken, cut into pieces — I buy a whole chicken and cut it myself into two marylands (thigh and leg attached) and two breast pieces with the wings on, all bone-in and skin-on. It’s more economical than buying separate pieces, and you get exactly what you want. Ask your butcher to do it if you’d prefer not to. You can absolutely use separate bone-in skin-on pieces instead — marylands, thighs or drumsticks all work beautifully in this soy sauce chicken recipe.
- Dark soy sauce — the most important ingredient for that deep mahogany color on the skin. It’s thicker, darker, and less salty than light soy. Don’t substitute with more light soy; they do completely different things.
- Light soy sauce — your primary seasoning. Use a good quality one; it really makes a difference when soy sauce is this central to a dish.
- Oyster sauce — adds glossy richness and a deep umami that rounds out the marinade beautifully. For gluten-free, use a certified GF oyster sauce.
- Sugar — just a teaspoon of white or brown sugar, but it helps the skin caramelize and lacquer in the oven and balances the saltiness of the soy. Brown sugar has a slight molasses depth that works particularly well here. Caster sugar is fine too.
- Sesame oil and white pepper — just a touch of each in the marinade for warmth and fragrance.
For the aromatic bed:
- Scallions (green onions) — 4 to 5 of them, green and white parts both, cut into lengths and bruised. They form the trivet the chicken sits on, prevent scorching, and release their own natural juices as they cook. Don’t skimp on these.
- Fresh ginger — a generous amount, about 10 slices from a walnut-sized knob, bruised well. The ginger is doing a lot of aromatic heavy lifting here, and you’ll really notice it in the pan juices. Fresh only — this is not the place for the stuff from a jar.
- Garlic — four smashed cloves tucked in with the ginger. They perfume the pan juices in the most wonderful way.
- Star anise — just two, for that classic Cantonese aromatic note in the background.
- Rice vinegar and water — a small amount of each, just enough to get the steam going without diluting anything. The rice vinegar adds a subtle tang that cuts through the richness of the marinade without being detectable in the finished dish.
For the scallion ginger oil sauce:
- Scallions — four of them, finely sliced, green and white parts. This sauce is intentionally generous — it’s that good. Scale it up if you want even more, which I’d encourage.
- Fresh ginger — about a tablespoon, finely grated or minced. Fresh is non-negotiable here. When the hot oil hits fresh ginger, it blooms in a way that jarred ginger simply cannot replicate.
- Fresh garlic — two cloves, finely minced. Same rule applies — fresh only.
- Peanut oil — four tablespoons, heated until smoking hot before being poured over the aromatics. Peanut oil has a subtle nuttiness that suits this sauce beautifully and is very traditional in Chinese cooking. A neutral oil with a high smoke point works too if you need a substitute (canola, avocado, etc.). Don’t use olive oil!
- Toasted sesame oil — just a teaspoon, mixed into the aromatics before the hot oil goes on, for fragrance.
- Salt — a teaspoon, which seasons the sauce properly. This scallion ginger oil relies on salt rather than soy, so the color stays bright, and the scallion flavor stays clean and forward.
How To Make Soy Sauce Chicken In A Dutch Oven
Find the full recipe and nutritional information below. Here are some handy step-by-step photos for how to braise soy sauce chicken in its own juices using a Dutch oven or heavy pot.
- Marinate the chicken overnight if you can. Mix together the dark soy, light soy, oyster sauce, brown sugar, sesame oil, and white pepper, and rub it all over the chicken — skin, bone side, and under the skin where you can get your fingers in. The overnight rest in the fridge is genuinely worth it; the color on the skin the next day is noticeably deeper, and the flavor goes all the way through. But, if in a rush, 30 minutes is a minimum.
- Build a generous aromatic bed. Scatter the scallions, ginger slices, smashed garlic, and star anise over the base of the dutch oven. This is your trivet and your flavor base — don’t be stingy with it.
- Add the liquid and the chicken. Pour the rice vinegar and water into the pot so it just barely covers the aromatics, then sit the chicken pieces on top, skin side up. Pour any leftover marinade from the plate straight over the chicken and let it trickle down.
- Low and slow with the lid on. Medium heat until you hear steam, then turn it down to low and leave it alone for 40 minutes. Don’t lift the lid — the trapped steam is doing all the work.
- Baste from the 40-minute mark. Lift the lid, spoon the concentrated pan juices over each piece of chicken, put the lid back on, and keep going. Do this once or twice more over the next 20 minutes. This basting is what starts building that lacquered finish before the oven even comes into play. The total cooking time on the stove is 60 minutes.
- Into the hot oven. Lid off, 220°C / 430°F, top shelf, 10 minutes. The skin will deepen in color and caramelize at the edges. Keep an eye on it — the dark soy and sugar mean it can catch quickly.
- Rest, then collect every drop of pan juices. Five minutes rest, then spoon out those concentrated juices from the bottom of the pot. Nothing gets left behind.
- Make the scallion ginger oil. While the chicken is cooking, mix the chopped scallions (green onions), grated ginger, minced garlic, sesame oil, and salt in a heatproof bowl. Heat the peanut oil in a small pan until smoking hot and pour it straight over — it will sizzle dramatically. Stir it all together immediately. Set aside. PS. This can also be done ahead of time.
- Build the bowl. Rice first, pan juices over the rice, chicken on top, scallion ginger oil spooned generously over everything. Greens on the side.
Watch The Video
Recipe Tips
- Bring the chicken to room temperature before cooking. Leave it out for 15-20 minutes.
- Don’t lift the lid for the first 40 minutes. The whole method relies on trapped steam — every time you open it, you lose heat and moisture. Trust the process.
- Overnight marinating makes a real difference. The color on the skin is noticeably deeper, and the flavor penetrates all the way through. If you only have 30 minutes, it will still be good, but if you have the time, do it overnight.
- Start basting at the 40-minute mark. This is what builds the lacquer before the oven. Don’t skip it.
- The pan juices are the sauce. The concentrated liquid at the bottom of the dutch oven — where the marinade has mingled with the scallion and ginger juices — is intensely flavored. Spoon it over the rice first so it soaks in, then add the chicken on top.
- Save the pan juices. Strain what’s left and refrigerate for up to 4 days or freeze for up to 3 months. Use it to braise eggs, as a noodle broth base thinned with water, or as a stir-fry seasoning. It gets better every time you use it.
- Make extra ginger scallion sauce. The quantities in the recipe are already generous, but if you’re a sauce person — and after tasting this, you will be — just scale it up. It takes five minutes and uses ingredients you already have out.
- Fresh ginger and garlic in the sauce, always. When smoking hot oil hits fresh aromatics, the result is something jarred ginger and garlic simply can’t replicate. This is one of those cases where it genuinely matters.
- Buying a whole chicken and cutting it yourself is more economical and straightforward than it sounds. A pair of sharp kitchen scissors and a heavy knife are all you need. Your butcher will also do it for you if you ask.
- If using boneless breast pieces, reduce the total stovetop time to around 50 minutes, as they cook faster than bone-in pieces.
- Gluten-free version: Use tamari in place of both soy sauces and a certified GF oyster sauce.
Serving Suggestions
This soy sauce chicken is a rice dish — that’s non-negotiable in my opinion. Jasmine rice is my preference; it’s fragrant, fluffy, and soaks up those pan juices in the most satisfying way. Regular medium or long grain white rice is fine, too!
Get the rice into the bowl first, ladle the juices over so they soak right in, then add the chicken and spoon the scallion ginger oil over generously.
For greens, I like bok choy or gai lan (Chinese broccoli) blanched for 2 minutes in boiling water, then tossed with a little sesame oil and a pinch of salt, OR with some oyster sauce. Broccolini works beautifully, too. Keep the sides simple — this chicken doesn’t need competition. The scallion ginger oil goes over everything, including the greens, and I’d encourage you not to hold back with it.
💬 If you’ve tried this soy sauce chicken with ginger scallion sauce or any other recipe on the blog then don’t forget to rate the recipe and let me know how you got on in the comments below, I love hearing from you! You can also FOLLOW ME on Instagram, Facebook, Pinterest, YouTube, and or sign up to my Newsletter to see more of my delicious food.